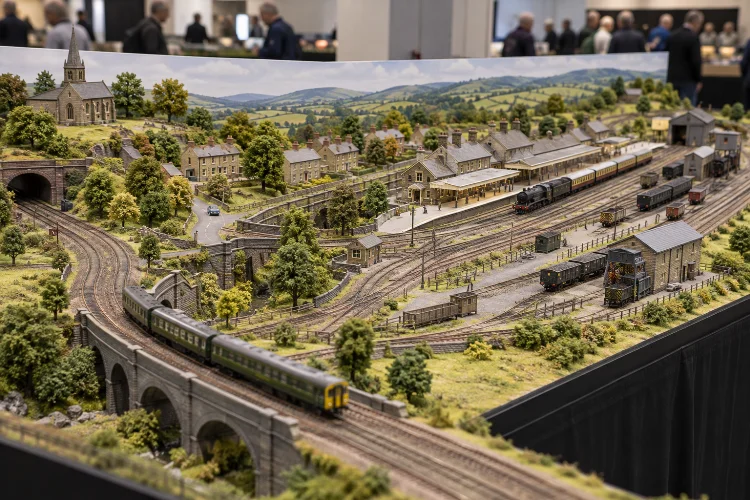
Imagine walking into a railway modelling exhibition and spotting a beautifully constructed layout. The locomotives glide smoothly through realistic junctions, passenger trains arrive at exactly the right moment, and the scenery makes the entire railway feel like a miniature world.
Everything looks effortless.
But behind that impressive display is something visitors rarely notice: a carefully considered track plan.
Advanced track planning principles for exhibition railway layouts involve much more than connecting sections of track or fitting as many sidings as possible onto a baseboard.
They require a thoughtful balance between realistic railway operations, engineering reliability, visual presentation, and practical exhibition requirements.
Unlike permanent home layouts, exhibition railways must survive transportation, repeated assembly, long operating sessions, and constant public attention.
That changes how experienced modellers approach almost every design decision.
Track geometry must be reliable, fiddle yards need sufficient capacity, operators require comfortable access, and the entire railway should remain entertaining throughout the event.
Whether you’re building a compact OO gauge branch line or an ambitious multi-section exhibition layout, understanding these advanced planning techniques can make an enormous difference.
Let’s explore how to design a railway that looks convincing, operates smoothly, and performs consistently under exhibition conditions.
1. Establishing a Clear Operational Concept Before Designing Trackwork
One of the most common mistakes in model railway planning is starting with track components instead of deciding how the railway should operate.
It’s tempting to fill a large baseboard with complicated junctions, multiple platforms, and extensive goods sidings.
However, more track doesn’t automatically create a better exhibition layout.
In fact, overly complicated arrangements can produce operational bottlenecks, unrealistic railway movements, and unnecessary maintenance problems.
Define the Purpose of Your Exhibition Railway
Start by identifying the type of railway you want to represent.
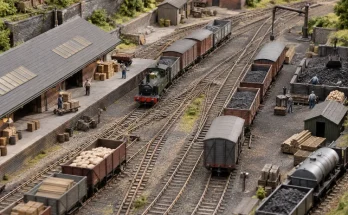
A countryside branch terminus, industrial freight yard, urban passenger station, and busy mainline junction all require different approaches.
A rural branch line might need only a platform, a run-round loop, and a small goods siding to create interesting movements.
An urban junction could require multiple running lines, crossovers, and carefully organised train sequencing.
The key is understanding what trains should actually do.
Think about where services originate, which tracks they use, where they stop, and how they leave the visible scene.
Every turnout should ideally serve a recognisable operational purpose.
Choose the Right Layout Configuration
Several established track configurations work particularly well at exhibitions.
An end-to-end layout creates a railway where trains travel between two terminal points or between a scenic station and an offstage storage area.
This design supports realistic passenger services, freight movements, and shunting activities.
A continuous-loop layout allows trains to circulate through the display, creating frequent movement that can attract visitors.
Meanwhile, a fiddle-yard-to-terminus design provides a compact arrangement that works especially well for branch lines and industrial scenes.
According to World of Railways’ guide to model railway trackplan types, each arrangement offers different advantages depending on available space and operating requirements.
The best choice isn’t necessarily the largest or most complex configuration. It’s the one that supports your intended railway story.
2. Applying Advanced Track Geometry for Reliable Exhibition Running
Track geometry is arguably the most important technical consideration in exhibition railway design.
A track plan might look excellent on a computer screen but become frustrating when real locomotives struggle through tight curves or complicated pointwork.
These problems become particularly noticeable during exhibitions, when the railway may operate continuously for several hours.
Optimising Curve Radius and Easements
Every locomotive and item of rolling stock has practical limitations regarding track curvature.
Long passenger coaches, large steam locomotives, and vehicles with body-mounted couplings can be particularly sensitive to sharp curves.
The National Model Railroad Association’s recommended practice RP-11 explains the relationship between model railway curvature, rolling stock dimensions, and operating characteristics.
Its guidance encourages using generous, properly eased curves wherever the available space allows.
For an OO gauge exhibition railway, a 610 mm curve radius might be a reasonable starting point for certain stock and layouts, but it isn’t a universal requirement or guarantee of reliable operation.
Long coaches and some locomotives may benefit from substantially broader curves.
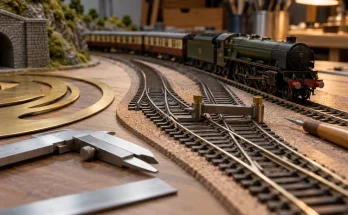
Easements, also called transition curves, help vehicles move gradually from straight track into a curve.
This reduces abrupt sideways movement and improves the visual appearance of longer trains.
However, the actual minimum radius should always be checked against the manufacturers’ requirements and tested with your intended rolling stock.
Understanding Reverse Curves and Turnout Geometry
Reverse curves occur when track bends in opposite directions over a relatively short distance.
They’re common around crossovers, station throats, and compact industrial sidings.
Unfortunately, they can cause coupling misalignment, buffer locking, and occasional derailments.
Where possible, introduce a suitable straight section between opposing curves and test the most demanding vehicle combinations.
Turnouts also deserve careful consideration.
A large-radius point may consume more space than a compact alternative, but it can improve the appearance and operation of longer vehicles.
For exhibition layouts, use complex point formations only when they provide a clear operational benefit.
Avoiding Unnecessary Gradients
Gradients introduce additional challenges involving traction, train length, and coupling behaviour.
PECO’s technical guidance recommends a maximum gradient steepness of around 1 in 36 as a general upper limit, although actual performance depends on the trains involved.
For longer formations, gentler gradients are preferable, and level track is often the safest solution.
Remember that the transition into a gradient matters too.
An abrupt change in vertical alignment may cause locomotives to lose traction or vehicles to uncouple, even when the gradient itself appears manageable.
For reliable exhibition running, uncomplicated track geometry is often a genuine advantage.
3. Designing Fiddle Yards for Efficient Train Management
Visitors usually focus on the scenic section of a railway layout.
Experienced exhibitors, however, know that the hidden storage area can determine whether an exhibition runs smoothly or becomes a constant struggle.
The fiddle yard acts as the railway’s operational backstage.
It stores trains, prepares upcoming movements, and allows operators to introduce different services without filling the visible layout with excessive infrastructure.
Matching Fiddle Yard Capacity to Train Frequency
A well-designed fiddle yard should accommodate the number and types of trains required by the operating sequence.
For example, imagine an exhibition layout featuring a fictional 1960s British mainline station.
Its planned sequence includes two passenger services, a parcels train, a local goods working, and a longer freight service.
The hidden storage arrangement must allow these movements to appear without creating unnecessary conflicts.
Simply adding five storage roads may not be sufficient if trains need reversing, locomotive changes, or a particular departure order.
Think about the entire operating cycle rather than storage capacity alone.
World of Railways’ fiddle yard guide describes several arrangements, including fans of sidings, traversers, and cassette-based systems.
Each design offers different advantages depending on space and operational needs.
Selecting Between Sidings, Traversers, and Cassettes
A conventional fan of storage sidings uses turnouts to connect multiple holding tracks.
It’s relatively straightforward to understand and supports varied train movements.
However, the pointwork requires additional space and can create maintenance demands.
A traverser moves several parallel storage roads sideways so they can connect with the main running line.
This arrangement can save space compared with a large turnout ladder, although the moving assembly must remain accurately aligned.
Cassettes provide another flexible solution.
Individual lengths of track containing trains or locomotives can be repositioned to introduce different services.
They’re especially useful for smaller layouts, but require secure handling arrangements and suitable electrical connections.
Plan for Operator Access
Storage capacity is only useful when operators can access trains comfortably.
Avoid placing critical hidden trackwork beneath permanently attached scenery or behind structural supports.
Leave room for operators to inspect wagons, retrieve derailed vehicles, and perform minor adjustments.
Also consider the storage length of complete trains.
A fiddle yard road that looks generous on a drawing might become unusable once locomotive length, coupling clearance, and stopping margins are considered.
A little extra space here can prevent significant operational frustration later.
4. Balancing Prototype Accuracy With Selective Compression
Railway modellers often face a difficult question: how do you fit a realistic railway location into a limited exhibition space?
Real stations, junctions, and goods yards can extend over hundreds or thousands of metres.
Even at relatively small modelling scales, reproducing every feature accurately would require an enormous layout.
That’s where selective compression becomes essential.
Preserving Operational Relationships
Selective compression involves shortening or simplifying elements while retaining the important features of the original railway.
For example, a prototype country station might include a long platform, run-round loop, goods siding, and nearby level crossing.
On a model, the distance between the station and crossing could be reduced without destroying the railway’s basic identity.
However, shortening the run-round loop too much could prevent the locomotive from performing its intended movements.
This highlights a useful planning principle: preserve function before exact distance.
Track lengths must still accommodate the trains and operating procedures you intend to reproduce.
Using Scenic Breaks Intelligently
Bridges, tunnels, road overpasses, warehouses, and natural landscape features can conceal the transition between visible and hidden railway sections.
They also provide opportunities to suggest that the railway continues beyond the physical boundaries of the layout.
An industrial siding disappearing behind a warehouse may represent a much larger factory complex.
Similarly, a double-track mainline entering a cutting can create the impression of an extensive railway network.
These techniques are especially effective when viewing angles are carefully controlled.
Avoiding the Overcrowded Layout Effect
One temptation is to include every appealing feature discovered during research.
Unfortunately, combining a major station, goods depot, engine shed, junction, and extensive industrial facilities into a small area can make the result feel unrealistic.
Give significant structures enough space to establish their purpose.
A modest station surrounded by convincing scenery may communicate a stronger sense of place than an overcrowded collection of railway buildings.
Successful compression removes unnecessary distance without removing the railway’s character.
5. Planning Modular Baseboards and Transport-Friendly Trackwork
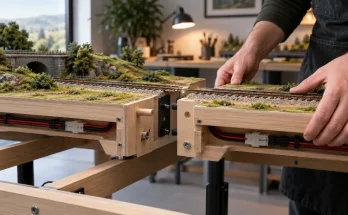
Unlike permanent layouts, exhibition railways must be dismantled, transported, assembled, and tested repeatedly.
This introduces engineering requirements that should influence track planning from the very beginning.
A layout that’s fantastic in a home workshop may be unsuitable for exhibitions if it requires complicated assembly or fragile connections.
Designing Track Around Baseboard Joints
Modular construction allows large layouts to be divided into transportable sections.
However, every baseboard joint creates a potential alignment problem.
Ideally, track should cross board joints at manageable angles, with rails firmly secured near the edges.
Avoid placing complex turnouts directly across joints whenever practical.
Accurate locating dowels, dependable mechanical fasteners, and stable baseboard materials help maintain track alignment.
The boards should also resist twisting during transport and changes in environmental conditions.
Even small variations can affect reliable running, particularly with finer track standards.
Considering Vehicle and Venue Dimensions
Before finalising the track plan, check the maximum dimensions of individual baseboards.
A module might fit perfectly inside your modelling room but be impossible to carry through a doorway or load into a vehicle.
Consider vehicle openings, storage space, lifting weight, and the number of people available to help.
Modular layouts also require room for support legs, lighting structures, backscenes, and control equipment.
Exhibition organisers often need the complete operational footprint, not merely the length of the scenic display.
That includes operator aisles, hidden storage sections, and any protective barriers.
Making Assembly Repeatable
Reliable electrical connections are particularly important when modules are frequently disconnected.
Use appropriately rated connectors, clear cable identification, and consistent wiring conventions.
MERG’s technical resources include guidance on model railway layout cabling and electrical systems.
One practical approach is to design each baseboard as a clearly documented electrical section.
Label its connectors and provide a simple wiring diagram.
This makes troubleshooting easier and reduces the likelihood of mistakes during hurried exhibition setup.
A little extra planning can make the difference between a succesful opening session and an afternoon spent searching for electrical faults.
6. Optimising Track Plans for Exhibition Visitors and Operators
An exhibition railway isn’t experienced in the same way as a private home layout.
Visitors may spend only a few minutes watching, while operators must manage the railway throughout the day.
Your track plan should accommodate both perspectives.
Designing Strong Viewing Angles
Think about the position of the audience before deciding where the most interesting trackwork should go.
A carefully modelled junction hidden behind a large building won’t have much impact if visitors can’t see the trains negotiating it.
Consider placing visually appealing operations near the front, while allowing major structures to frame the scene.
Curved tracks can create a sense of depth, particularly when trains gradually appear from behind scenery.
However, extremely tight curves at the front edge may look unnatural.
Track placement should support the overall composition rather than simply follow the edge of the baseboard.
Choosing an Appropriate Viewing Height
Exhibition layouts are displayed to people of different heights and ages.
Higher layouts can produce realistic near-eye-level views, while lower displays may provide better visibility for children and wheelchair users.
There isn’t one perfect height for every exhibition.
The right solution depends on the scale, scenic composition, venue arrangements, and intended audience.
For taller layouts, consider safe viewing aids where appropriate and agreed with organisers.
Any raised viewing arrangements must be stable and suitable for public use.
Maintaining Operator Comfort and Visibility
Operators need clear sightlines across station platforms, pointwork, signals, and hidden storage areas.
A layout may be visually impressive from the audience side while being surprisingly difficult to operate from behind.
Think carefully about control panel positioning and access to important junctions.
Avoid requiring operators to constantly reach over delicate scenery.
Control arrangements should also make it easy to understand which train has permission to move and which route is selected.
For multi-operator layouts, divide responsibilities into logical operating areas.
Clear communication reduces confusion and helps maintain consistent train movement.
Creating an Interesting Operating Rhythm
An exhibition railway should have enough activity to hold attention without appearing unnaturally busy.
A continuous procession of trains may suit a mainline layout, but it could look strange on a rural branch with infrequent services.
Instead, create movement appropriate to the prototype.
A passenger arrival might be followed by locomotive run-round operations, goods shunting, and a later departure.
Even quiet periods can feel engaging when visitors understand what’s happening.
A discreet information panel describing the railway’s location, historical period, and operating purpose can help communicate the story.
7. Stress-Testing the Track Plan Before Exhibition Day
A successful exhibition railway needs more than attractive scenery and carefully designed trackwork.
It needs reliablity under demanding operating conditions.
A locomotive that runs perfectly for ten minutes at home might develop problems after several hours of repeated movements.
The solution is systematic testing before the layout reaches an exhibition hall.
Test the Most Difficult Movements First
Begin by identifying the sections most likely to cause trouble.
These often include sharp curves, complex crossings, reverse curves, steep gradients, and baseboard joints.
Run your longest passenger coaches, most demanding locomotives, and lightest wagons through these areas.
Test both directions of travel.
Pay particular attention to movements involving coupling compression, such as propelling wagons into sidings.
A route that handles a locomotive moving forward may behave differently when several vehicles are pushed through the same turnout.
Simulate an Entire Exhibition Session
Don’t limit testing to individual trains.
Run a complete operating schedule that reflects the intended exhibition timetable.
This reveals problems that isolated testing might miss, including fiddle yard congestion, conflicting routes, and awkward operator handovers.
For example, a timetable might appear realistic until two trains require access to the same storage road.
Discovering that conflict during planning is much easier than redesigning the railway during an exhibition.
A longer trial also helps expose intermittent electrical faults and mechanical weaknesses.
Build Maintenance Access Into the Design
Preventive maintenence should be considered part of track planning.
Hidden track sections, turnout motors, wiring connections, and control equipment must remain accessible.
Provide removable panels where necessary and avoid burying essential components beneath permanent structures.
It’s also worth keeping a small collection of spare electrical connectors, track-cleaning equipment, and replacement components.
If a problem occurs, accessible components are much easier to repair.
Review Performance After Every Exhibition
Exhibitions provide valuable opportunities to learn how the layout performs in real conditions.
Keep a record of derailments, electrical interruptions, operator difficulties, and repeated bottlenecks.
Look for patterns rather than treating every incident as an isolated problem.
If wagons frequently derail at the same crossover, investigate its geometry instead of repeatedly replacing the vehicles.
If visitors consistently gather near one particular scene, consider whether the surrounding track arrangement could offer more engaging movements.
This feedback helps turn a good exhibition layout into an increasingly refined one.
Advanced track planning principles for exhibition railway layouts combine railway realism, technical precision, practical engineering, and visitor experience.
A successful design begins with a clear operating concept and develops through reliable track geometry, efficient fiddle yards, carefully compressed infrastructure, and transport-friendly baseboards.
Just as importantly, the finished railway must remain accessible, comfortable to operate, and interesting for exhibition visitors.
The most impressive layouts aren’t always the largest or most complicated. They’re the ones where every track, junction, and operating movement contributes to a believable miniature railway.
Ready to plan your next exhibition layout? Start by sketching your operational concept, testing essential track arrangements, and building reliability into the design before adding scenery.
With thoughtful planning and regular testing, your railway can deliver realistic, engaging performances at exhibition after exhibition.